- Today
- Total
개발하는 고라니
[RabbitMQ] Spring Boot + RabbitMQ (basic) 본문
Spring Boot 환경에서 RabbitMQ로 메세징 해보는 간단한 예제이고, 원본은 spring.io의 docs이다. 이 예제를 구현해보기 위해 RabbitMQ가 설치되어있어야 한다( 혹은 docker로 가능).
이 예제는 AMQP RabbitMQ Server를 설정하는 과정을 겪을 수 있고, 메세지를 발행(pub)과 소비(sub)하고 스프링부트 어플리케이션을 만들어 RabbitMQ 서버와 상호작용한다.
Spring AMQP(Advanced Message Queuing Protocol)의 RabbitTemplage을 사용함으로써 메세지를 발행(pub)하고, MessageListenerAdapter를 사용해 POJO(Plain Old Java Object) 형태의 메세지를 소비(sub)하는 어플리케이션을 빌드하게 될 것이다.
필요한 것들
- 15분
- 최애 IDE (난 IntellJ)
- JDK 11 ~
- gradle or maven
- rabbit server (없다면 https://spring.io/guides/gs/messaging-rabbitmq/ 에서 참고 install or docker)
Start

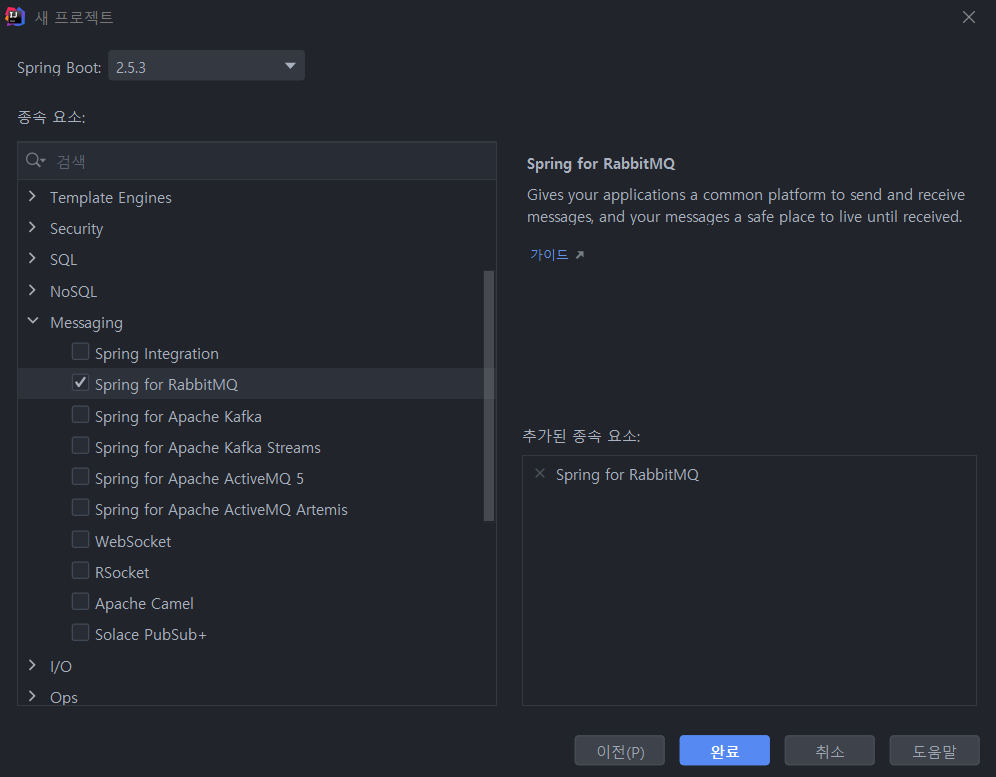
종속 요소는 Spring for RabbitMQ만 추가하면 된다.
//gradle
plugins {
id 'org.springframework.boot' version '2.5.3'
id 'io.spring.dependency-management' version '1.0.11.RELEASE'
id 'java'
}
group = 'com.gorany'
version = '0.0.1-SNAPSHOT'
sourceCompatibility = '11'
repositories {
mavenCentral()
}
dependencies {
implementation 'org.springframework.boot:spring-boot-starter-amqp'
testImplementation 'org.springframework.boot:spring-boot-starter-test'
testImplementation 'org.springframework.amqp:spring-rabbit-test'
}
test {
useJUnitPlatform()
}
Create Receiver
메세징 기반의 어플리케이션에서 발행된 메세지를 받아줄 Receiver가 필요하다.
package com.gorany.rabbitmqspring.sub;

import org.springframework.stereotype.Component;

import java.util.concurrent.CountDownLatch;

@Component
public class Receiver {

    private CountDownLatch latch = new CountDownLatch(1);

    public void receiveMessage(String message){
        System.out.println("<== Received : " + message);
        latch.countDown();
    }

    public CountDownLatch getLatch(){
        return latch;
    }
}
Receiver는 메세지를 받아주는 메서드로 정의한 POJO class이다. 메세지를 받기위해 그것을 등록할 때 당신이 원하는 어떤 것이든 이름을 줄 수 있다.
편의상 POJO는 또한 CountDownLatch를 갖는데, 이는 메세지를 받았다는 신호를 주게한다. 이것은 production 어플리케이션에서 구현할 필요가 없는 것이다.
Register Listener and Send messages
Spring AMQP의 RabbitTemplate는 당신이 RabbitMQ와 메세지를 주고 받는데 필요한 모든 것을 제공한다. 그러나 다음을 수행 해야한다.
- Message Listener Container를 설정한다.
- Queue, 교환기(Exchange)를 선언하고, 그들을 바인딩 해준다.
- 리스너를 테스트하기 위해 메세지를 보낼 구성요소를 설정한다.
Spring Boot는 자동으로 Connection Factory와 RabbitTemplate를 만들어주어 당신이 작성해야할 코드가 줄어든다.
메세지를 보내기 위해 RabbitTemplate를 사용할 것이고, 메세지를 수신하기 위해 Message listener Container와 함께 Receiver를 등록할 것이다. ConnectionFactory는 둘 모두를 구동하여 컨테이너와 리시버를 RabbitMQ 서버에 연결해준다.
다음은 SpringBoot의 Container class이다.
package com.gorany.rabbitmqspring;

import com.gorany.rabbitmqspring.sub.Receiver;
import org.springframework.amqp.core.Binding;
import org.springframework.amqp.core.BindingBuilder;
import org.springframework.amqp.core.Queue;
import org.springframework.amqp.core.TopicExchange;
import org.springframework.amqp.rabbit.connection.ConnectionFactory;
import org.springframework.amqp.rabbit.listener.SimpleMessageListenerContainer;
import org.springframework.amqp.rabbit.listener.adapter.MessageListenerAdapter;
import org.springframework.boot.SpringApplication;
import org.springframework.boot.autoconfigure.SpringBootApplication;
import org.springframework.context.annotation.Bean;

@SpringBootApplication
public class RabbitMqSpringApplication {
    //교환기(Exchange) 이름
    static final String topicExchangeName = "spring-boot-exchange";

    //Queue 이름
    static final String queueName = "spring-boot";

    //Declare Queue
    @Bean
    Queue queue() {
        return new Queue(queueName, false);
    }

    //Declare Exchange
    @Bean
    TopicExchange exchange() {
        return new TopicExchange(topicExchangeName);
    }

    //Binding
    @Bean
    Binding binding(Queue queue, TopicExchange exchange) {
        return BindingBuilder.bind(queue).to(exchange).with("foo.bar.#");
    }

    //Message Listener Container
    @Bean
    SimpleMessageListenerContainer container(ConnectionFactory connectionFactory,
                                             MessageListenerAdapter listenerAdapter) {
        SimpleMessageListenerContainer container = new SimpleMessageListenerContainer();
        container.setConnectionFactory(connectionFactory);
        container.setQueueNames(queueName);
        container.setMessageListener(listenerAdapter);
        return container;
    }

    @Bean
    MessageListenerAdapter listenerAdapter(Receiver receiver) {
        return new MessageListenerAdapter(receiver, "receiveMessage");
    }

    public static void main(String[] args) throws InterruptedException {
        SpringApplication.run(RabbitMqSpringApplication.class, args).close();
    }
}- @SpringBootApplication : 다음의 모든 어노테이션을 편리하게 추가해주는 어노테이션
- @Configuration : 설정파일로 빈 등록
- @EnableAutoConfiguration : 스프링 부트에게 classpath 설정에 기반한 beans를 추가하는 것을 시작하라고 말한다.
- listenerAdapter()에 정의된 Bean 메서드는 Container(container()에 정의된)안에 등록되는 메세지 리스너를 등록되게 한다. 이는 'spring-boot'라는 이름의 Queue 에서 메세지를 리스닝한다. 왜냐하면 Receiver는 POJO이기 때문에, MessageListenerAdapter로 한번 감싸져야한다. 만약 그것이 receiveMessage를 호출하도록 지정할 경우
JMS Queue와 AMQP Queue는 의미론적인 면에서 차이를 갖는다.
JMS는 큐에 들어간 메세지를 오직 한 소비자에게만 보낸다.
반면에 AMQP Queue는 동일한 작업을 하지만, AMQP Producer는 Queue에 '직접' 메세지를 보내지 않는다.
대신에 메세지는 교환기(Exchange)에 보내지고 하나의 Queue 또는 여러 Queue에 펼쳐질 수 있다. JMS topics의 개념을 따라간다.
메세지 리스너 컨테이너(Message Listener Container)와 리시버(Receiver) Bean만 있으면 당신이 리스닝 하고싶어하는 모든 메세지를 수신할 수 있다. 메세지를 보내기 위해 또한 RabbitTemplate를 사용할 필요가 있다.
queue() 메서드는 AMQP Queue를 만들어준다. exchange() 메서드는 topic 타입의 교환기를 만들어준다. binding() 메서드는 RabbitTemplate이 메세지를 교환기에게 발행할 때 일어나는 행위를 정의하도록 바인딩해준다.
Spring AMQP는 적절히 설정하기 위해 Spring beans 최상단에 선언된 Queue, topic 타입 교환기, 바인딩 bean이 필요하다.
위의 경우 topic exchange를 사용하고, Queue는 'foo,bar.#' 형태의 routing key로 바인딩 되어있다. 이 의미는 발송된 메세지가 'foo.bar'로 시작하는 라우팅 키를 갖으면, foo.bar로 바인딩된 모든 Queue로 라우팅 됨을 의미한다.
Send a message
간단하게 테스트 메세지는 CommandLineRunner에서 보내진다.
import java.util.concurrent.TimeUnit;

import org.springframework.amqp.rabbit.core.RabbitTemplate;
import org.springframework.boot.CommandLineRunner;
import org.springframework.stereotype.Component;

@Component
public class Runner implements CommandLineRunner {

  private final RabbitTemplate rabbitTemplate;
  private final Receiver receiver;

  public Runner(Receiver receiver, RabbitTemplate rabbitTemplate) {
    this.receiver = receiver;
    this.rabbitTemplate = rabbitTemplate;
  }

  @Override
  public void run(String... args) throws Exception {
    System.out.println("Sending message...");
    rabbitTemplate.convertAndSend(MessagingRabbitmqApplication.topicExchangeName, "foo.bar.baz", "Hello from RabbitMQ!");
    receiver.getLatch().await(10000, TimeUnit.MILLISECONDS);
  }

}
template은 메세지를 'foo.bar.baz'라는 라우팅 키와 함께 교환기로 라우팅하는 것을 주의하자.
Run the App
메인메서드를 실행시키면 절차가 실행되고, 이는 메세지 수신을 시작하는 메세지 리스너 컨테이너를 시작한다. Runner 빈은 자동으로 실행이되어 RabbitTemplate을 이용해 메세지 하나를 보내는데, Exchange 이름은 사전에 정의한 "spring-boot" 교환기로 가고, 메세지와 함께 가는 라우팅 키는 "foo.bar.baz"이다. 그리고 메세지는 "Hello from RabbitMQ"이다.
# References (source)
Messaging with RabbitMQ
this guide is designed to get you productive as quickly as possible and using the latest Spring project releases and techniques as recommended by the Spring team
spring.io
'Open Source > RabbitMQ' 카테고리의 다른 글
| [RabbitMQ] Tutorials (6) (0) | 2021.07.29 |
|---|---|
| [RabbitMQ] Tutorials (5) (0) | 2021.07.29 |
| [RabbitMQ] Tutorials (4) (0) | 2021.07.29 |
| [RabbitMQ] Tutorials (3) (0) | 2021.07.28 |
| [RabbitMQ] Tutorials (2) (0) | 2021.07.23 |


